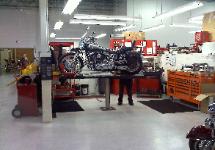
Get your motorcycle ready for Sturgis or any road trip!

This Road Trip inspection article is written with the assumption that you currently have a manual for your motorcycle. If you do not have the owner’s manual, I recommend you purchase one. At the very least you should have a Clymer manual or something similar for your motorcycle model/year. All brands/models/years have different requirements. Manuals are available at Amazon.com from a variety of retailers.
When you prepare your motorcycle, keep in mind the amount of miles you will be accumulating on your trip. If you recently replaced fluids, remember you may be adding thousands of miles to these fluids in the course of a week. The same applies to your tires, cables, spark plugs, air filter, etc.
The popular, highly accepted standard for motorcycle pre-trip inspection; is the T-CLOCS check list.
Tires and Wheels: Check your tires for tread wear, it is recommended that the tire has at least 50% of its tread. Check for any deep cuts or embedded objects such as stones, etc. In addition, the rear tire will get a flat spot and the front tire will get cupped eventually, this affects the handling ability of your motorcycle. While traveling long distances you may encounter conditions that can become harsh and climates that perhaps you’re not typically exposed to. Heavy rain is highly likely at some point during your trip, it is important that you have good tread for traction in rain conditions.
Check your rims for any dents or cracks. If you have spoke wheels, make sure they are tight and straight. A loose spoke can cause a slight wobble in your wheel and/or damage to spoke, rim and hub.
Whenever you bring your bike in, or your wheels in, for tire replacement, have the bearings inspected. It is not uncommon for the wheel bearings to need replaced before the recommended intervals.
Check your pressure often; before and during your trip.
Cables and Controls: Check your brake, clutch, throttle, and shifter. Your clutch should operate smoothly. Your brakes should be firm and hold the bike from movement. Visually check all cables for any wear or frays, if you detect any problems they should be replaced. Check your brake pads for sufficient pad thickness, use a flashlight if necessary to see without removing calipers.
Lights: Check your headlight, tail light, brake light, and turn signals every time you ride. If you have an additional load from camping gear, clothing, etc. . . and/or are traveling with a passenger, check the clearance under the rear fender. It is possible that the wiring can rub the tire; this will cause a break in the wire.
Oils and Fluids: Change your fluids according to your maintenance schedule. Check the levels of your fluids prior to your road trip. Consult your owner’s manual for proper levels.
If you have a battery that uses water, check the water levels. If you have a HD battery it is sealed and there is not any maintenance to be performed, other than ensuring the terminals are clean. Unless you have a REALLY old HD battery. In that case, you might want to replace your battery anyway.
If you keep your bike on a battery tender I recommend removing the tender for several days (long before the trip). This is recommended to see if you have any hidden issues draining your battery that you are not aware of. If you do not have electricity available to you during your road trip and not plugging it into a tender every night, you may find yourself stranded with a dead battery. I bring this point up due to my personal experience with my motorcycle IAC cycling. This issue has caused batteries to drain completely dead, sometimes the only symptom of this problem. Do this in advance to allow enough time to fix any problem you may have before your road trip.
Chassis: Inspect the chassis for cracks at gussets and accessory mounts. Check the steering for smoothness by turning the handlebars through the full operating range. Test the suspension for smooth, damped movement, and be sure to adjust it according to the load you’re carrying and your riding style, consult your owner’s manual. Harley-Davidson recommends for high-mileage bikes, that you inspect the drive belt and sprockets. Check all the fasteners for tightness. DO NOT tighten above manufacturer recommend torque ratings. Be sure you consult your owner’s manual for correct torques.
Sidestand (Kickstand): Check your kickstand for tension to be sure it remains in the up position when not in use. It is useful to bring a metal plate or piece of wood for the kickstand to rest on; you may encounter mud or extremely hot asphalt which will allow your kickstand to sink.
For a complete, printable (.pdf file), check list click HERE (this will print default 8 1/2 x 14 – use the printer option to resize to fit page for standard size paper). Although you have performed the regular maintenance for your motorcycle and the pre-trip inspection, things happen. Be prepared for breakdowns by carrying the correct tools for your motorcycle. If you are riding with a group, it is usually only necessary for one or two of your members to have tools.
Have a great trip and RIDE SAFE!!
 Get your bike ready for Sturgis!
July 2011
Ridersinfo.net
Countdown to Sturgis
 Get your bike ready for Sturgis!
July 2011
Ridersinfo.net
Countdown to Sturgis